This guide covers a full shifter linkage replacement on a GC8 — short shifter, pivot bushings, front and rear shifter bushings, and the new Kartboy Solid Shifter Joint with the 5-speed clevis. If you're only doing the joint and clevis, most of this still applies.
Parts in This Install
-
Kartboy Solid Shifter Joint
-
Kartboy 5-Speed Input Clevis
-
Kartboy Short Shifter
-
Kartboy Pivot Bushings
-
Kartboy Front Shifter Bushings
-
Kartboy Rear Shifter Bushing
New hardware is included with the Solid Shifter Joint. Don't throw it away.
Tools You'll Need
-
Hammer
-
Company23 Axle Pin Punch Tool (highly recommended — makes this job far easier)
-
Additional punches (a couple different sizes doesn't hurt)
-
Circlip/snap ring pliers
-
12mm socket and wrench
-
13mm wrench or socket
-
Deep sockets + extensions (for transmission mount bolts)
-
Flex-head ratchet
-
Automotive grease (any is fine — Valvoline is what was used in this install)
-
White lithium grease (for bushings)
-
Razor blade (helpful for removing old rubber bushings)
Step 1 — Pull the Interior Trim and Shifter
Pop the shift knob off. Remove the screws from the interior trim surround around the shifter and lift the piece off.


With the trim out of the way, you'll see the shifter, the shift selector rod, and a snap ring at the bottom of the shifter assembly.

Use a 12mm socket to remove the bolt that holds the factory shifter in place topside. Then go underneath.

Step 2 — Remove the Snap Ring
The snap ring on the 5-speed sits underneath the ball cup. This is what locks everything in place from inside the cabin. Get your circlip pliers in there and rotate the assembly slightly with a screwdriver if you need a better angle.

Once the ring is off, the shifter pulls straight out from inside. Keep the ball cup — you'll reuse it.
Step 3 — Drop the Lower Shifter Arm
From underneath the car, remove the nut on the front of the lower shifter arm to expose the front shifter bushings. Then crack loose the rear shifter bushing bolts.
Before you take that front nut off: if your car has an external neutral centering spring (GC8 and some other older models do), remove the spring first. If you don't, the plate will go wobbly on you when it comes free and you'll be chasing it.

Once the spring is out of the way, take off the front nut, slide the plate off.
Remove the rear bushing bolts.

Pull the entire lower shifter rod assembly out as one unit. Set it on the bench.

Step 4 — Remove the Old U-Joint
With the lower rod out, the U-joint is the last piece. Start by removing the rear bolt to disconnect the upper shift linkage. Then drive out the roll pin that holds the clevis to the transmission.

The Company 23 Axle Pin Punch Tool is great for this — Subaru uses a double roll pin design (a pin inside a pin), and this tool lets you seat the roll pin on the tip and get it up into position before driving. Shifting the car into a different gear can help with clearance.

Once the pin is out, the joint slides free. Old and busted. Time for new hotness.
Step 5 — Bench Work: Prep the New Parts
Strip the old bushings
The old front shifter bushings are soft rubber and probably showing their age. A razor blade works well to cut them and make it easier to push out. The rear bushing you can just pull off as well.

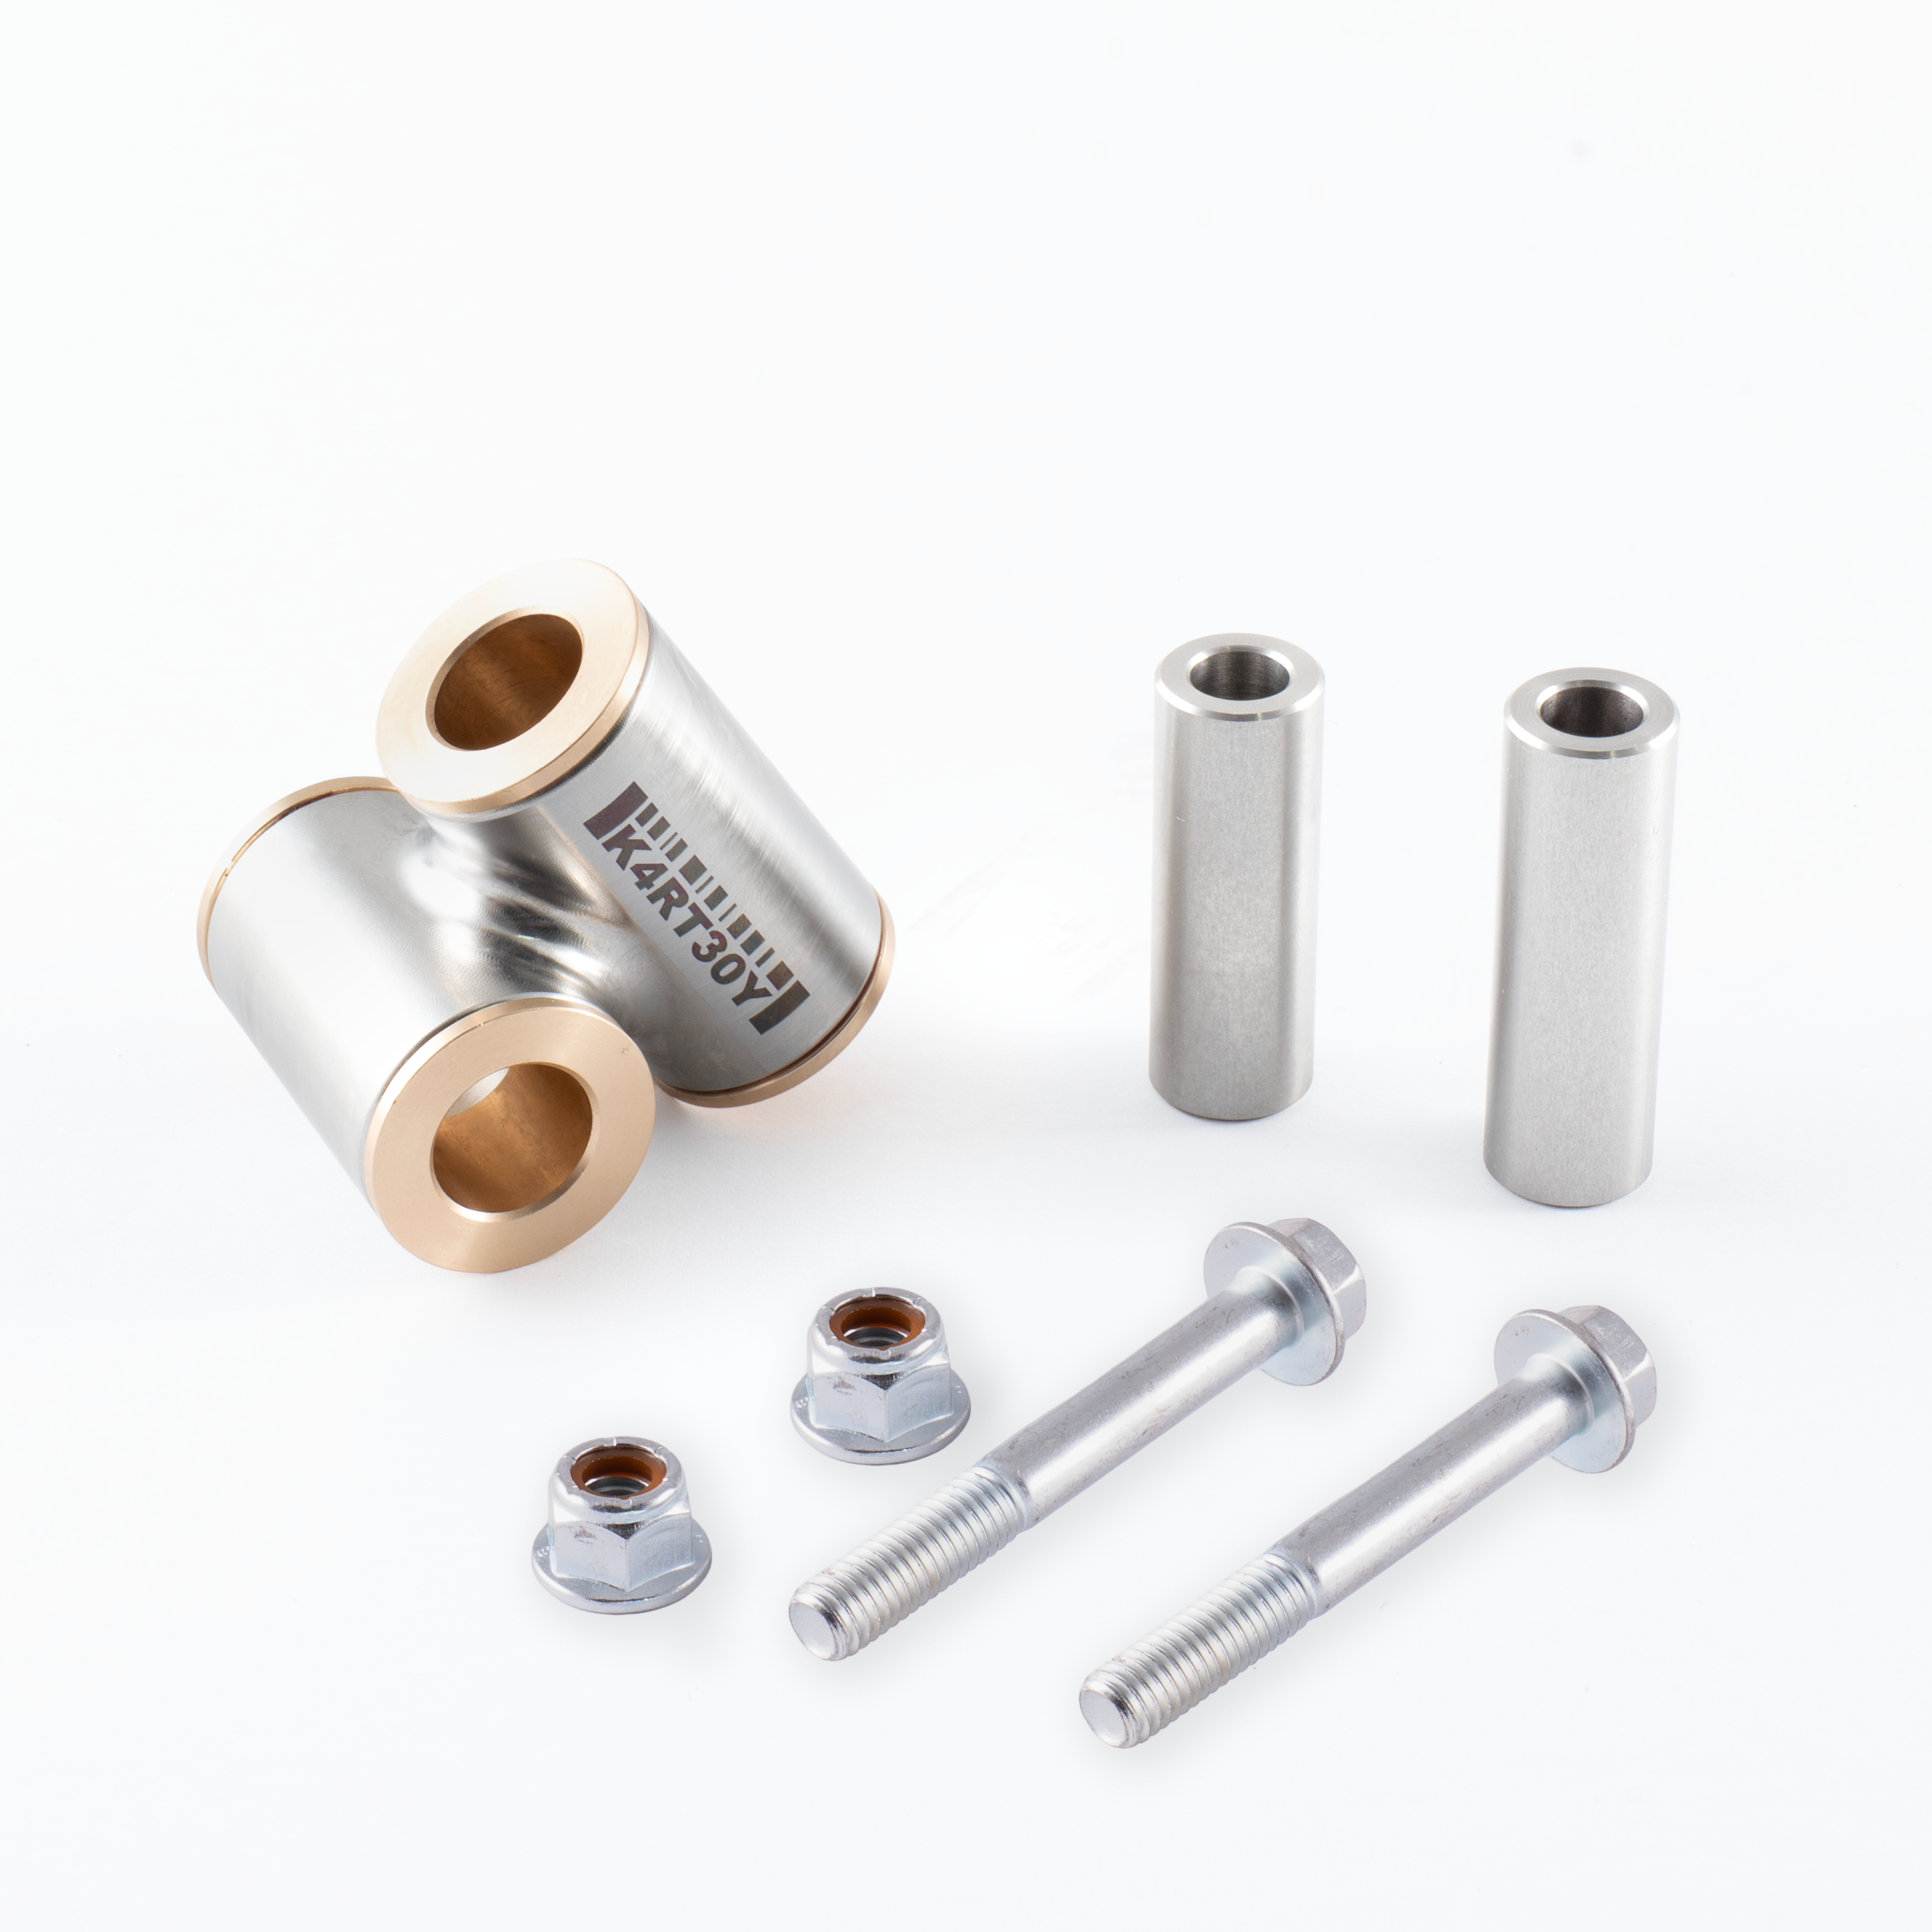
The New Joint!
The factory joint has rubber bushings that crack over time (yours may already be missing a chunk). The Kartboy Solid Shifter Joint uses self-lubricating bronze bushings, pressed in at the factory. No assembly required on the joint itself.
Grease the Solid Shifter Joint — before you install it
This is critical and easy to forget. Do it on the bench now.
Use any automotive grease. Pack it into the crush tube area and the bushings, and cycle the joint back and forth a few times. There's a small gap under the crush tube where the bushings don't fully close — that gap traps grease and keeps things lubed over time.
Also grease the ends. Go heavy.

Orient the joint correctly
The Kartboy logo goes down — toward the ground when installed. The text on top faces the front of the car. On the 5-speed, the joint is slightly offset, so orientation matters. Get it right on the bench before you're fighting it under the car.

Assemble the joint and clevis on the bench
Thread in the included bolt (put a little grease on it) and snug down the nylon locking nut. 12mm on the bolt head, 13mm on the nut.

About the Kartboy design: even fully torqued down, the joint moves completely freely because the crush tube prevents the bolt from clamping the bushings. No binding or play. That's the point.
Grease up the second cross tube as well while you're at it.
Prep the lower shifter rod
Push the front shifter bushings into the rod with a bit of white lithium grease — they just press in. Do the same with the rear bushing on the lower rod. Snug fit.
Step 6 — Install the New Clevis and Joint
Back under the car.
Orientation for 5-speed install:
-
The rib faces up
-
The neutral centering spring hole faces the passenger side (US cars)
-
The bolt goes through from the passenger side toward the driver's side
If the bolt goes the wrong direction, the nut will contact the transmission body when you shift.

One more 5-speed-specific thing: the U-bracket on the upper selector rod tends to get slightly bent from the factory— it clamps down on whatever joint was in there before. Gently adjust those tabs before you try to slide the rear of the joint in.

Installation order:
-
Slide the clevis onto the transmission output, holes aligned

-
Slide the upper selector rod over the clevis
-
Start the rear bolt with the nylon nut loosely — leave it loose until the roll pin is driven home
-
Drive the roll pin flush with the bottom surface of the new clevis

-
Tighten the rear bolt — 12mm on the bolt, 13mm on the nut. Tighten the supplied hardware until the nylon locking nut is fully engaged. The crush tube design prevents the bushings from binding when fully tightened.

Step 7 — Reinstall the Lower Shifter Rod
If your car has an external neutral centering spring, seat it into the clevis first before bringing the lower rod up — easier to position before everything is in place.
Slide the lower shifter rod assembly back up into position. Thread in the rear bushing bolts (Kartboy includes new ones — use them).


Reinstall the front bushing plate and nut. A flex-head ratchet and extensions will help with the rear bolts. Reattached the neutral centering spring.

Step 8 — Shifter Pivot Bushings
These are pretty easy. Just pop out the old ones and put the new ones in with the crush tube.
Step 9 — Reinstall the Shifter Inside
Drop the shifter back in through the cabin. Reinstall the ball cup. Snap the circlip back onto the bottom. Reinstall the 12mm bolt topside that holds the shifter body.


Reinstall the interior trim surround. Thread the screws back in carefully. Reinstall the shift knob.
Watch the full install video on the Kartboy YouTube channel.
Share:
Wicked Big Meet and the $1,000 Car That Refused to Die